Using VSCode to configure remote servers
Ever wanted a nice, easy way of editing files on a remote system? It might not be the best, but it is free. VSCode remoting has got your back.

I sat down to write an article on how to roll your own DNS and just thought to myself, 'I usually do this using VSCode or one of the JetBrains IDEs, so why would I not do so now?' So here we are...
The Basics
For those who already know or simply want to get it working, this section may not be of interest to you.
For those who want a little background, let's think about how you might connect to a remote server. In this case, by remote server, I primarily mean Linux, but Windows is also making progress in this area.
My Linux flavour of choice is always Debian, but others are available and should involve similar, if not identical, steps. I'm working under the assumption that you have a functioning Debian server to connect to and that most, if not all, of the settings are still on their default values.
Basic SSH Server Settings (SSHD)
Most users using SSH will be using OpenSSH on both ends. However, you may find that Putty or another client can be useful for initial setup and tweaking. In this case, I am connecting to a low-cost VM hosted by Fasthosts here in the UK, so this doesn't affect me, as I can use password-based authentication by default. Additionally, by default, root can connect; however, other providers may block this. I will include instructions on how to block this as a good first step to hardening your instance.
- Connect to your server and open the below file in your favourite editor as root, here I've chosen nano but there are other options such as vim.
sudo nano /etc/ssh/sshd_config- Edit the file to include the following.
#Used to prevent root from logging in.
PermitRootLogin no
#Used to prevent timeout periods when connected in VSCode
ClientAliveInterval 120
I've also included the full file here in case you mess anything up. There may be other settings you should change from a security standpoint, but that is outside of the scope of this post.
/etc/ssh/ssdh_config
# This is the sshd server system-wide configuration file. See # sshd_config(5) for more information. # This sshd was compiled with PATH=/usr/local/bin:/usr/bin:/bin:/usr/games # The strategy used for options in the default sshd_config shipped with # OpenSSH is to specify options with their default value where # possible, but leave them commented. Uncommented options override the # default value. Include /etc/ssh/sshd_config.d/*.conf #Port 22 #AddressFamily any #ListenAddress 0.0.0.0 #ListenAddress :: #HostKey /etc/ssh/ssh_host_rsa_key #HostKey /etc/ssh/ssh_host_ecdsa_key #HostKey /etc/ssh/ssh_host_ed25519_key # Ciphers and keying #RekeyLimit default none # Logging #SyslogFacility AUTH #LogLevel INFO # Authentication: #LoginGraceTime 2m #PermitRootLogin prohibit-password #StrictModes yes #MaxAuthTries 6 #MaxSessions 10 PermitRootLogin no #PubkeyAuthentication yes # Expect .ssh/authorized_keys2 to be disregarded by default in future. #AuthorizedKeysFile .ssh/authorized_keys .ssh/authorized_keys2 #AuthorizedPrincipalsFile none #AuthorizedKeysCommand none #AuthorizedKeysCommandUser nobody # For this to work you will also need host keys in /etc/ssh/ssh_known_hosts #HostbasedAuthentication no # Change to yes if you don't trust ~/.ssh/known_hosts for # HostbasedAuthentication #IgnoreUserKnownHosts no # Don't read the user's ~/.rhosts and ~/.shosts files #IgnoreRhosts yes # To disable tunneled clear text passwords, change to no here! PasswordAuthentication no #PermitEmptyPasswords no # Change to yes to enable challenge-response passwords (beware issues with # some PAM modules and threads) KbdInteractiveAuthentication no # Kerberos options #KerberosAuthentication no #KerberosOrLocalPasswd yes #KerberosTicketCleanup yes #KerberosGetAFSToken no # GSSAPI options #GSSAPIAuthentication no #GSSAPICleanupCredentials yes #GSSAPIStrictAcceptorCheck yes #GSSAPIKeyExchange no # Set this to 'yes' to enable PAM authentication, account processing, # and session processing. If this is enabled, PAM authentication will # be allowed through the KbdInteractiveAuthentication and # PasswordAuthentication. Depending on your PAM configuration, # PAM authentication via KbdInteractiveAuthentication may bypass # the setting of "PermitRootLogin prohibit-password". # If you just want the PAM account and session checks to run without # PAM authentication, then enable this but set PasswordAuthentication # and KbdInteractiveAuthentication to 'no'. UsePAM yes #AllowAgentForwarding yes #AllowTcpForwarding yes #GatewayPorts no X11Forwarding yes #X11DisplayOffset 10 #X11UseLocalhost yes #PermitTTY yes PrintMotd no #PrintLastLog yes #TCPKeepAlive yes #PermitUserEnvironment no #Compression delayed #ClientAliveInterval 0 #ClientAliveCountMax 3 #UseDNS no #PidFile /run/sshd.pid #MaxStartups 10:30:100 #PermitTunnel no #ChrootDirectory none #VersionAddendum none ClientAliveInterval 120 # no default banner path #Banner none # Allow client to pass locale environment variables AcceptEnv LANG LC_* # override default of no subsystems Subsystem sftp /usr/lib/openssh/sftp-server # Example of overriding settings on a per-user basis #Match User anoncvs # X11Forwarding no # AllowTcpForwarding no # PermitTTY no # ForceCommand cvs server
VSCode Setup
Now we are all on the same playing field with regards to server lets look at the setup within VSCode.
You'll want to make sure you have the following three extensions installed:
Next, you'll want to create two new files if you are on Windows, like I am.
VSCode - System-Wide Config
You'll want to create a file called ssh_config here:
C:\ProgramData\ssh\ssh_configHere I have placed a couple of settings I want to globally affect any of my SSH windows on this PC, for instance I would like my username to default to Adam, for a full list of available settings and what they do checkout this cheatsheet.
Host *
	Port 22
	User adam
	ServerAliveInterval 60
	ServerAliveCountMax 3
	ForwardAgent yes
VSCode - User Config
Next, you'll want to create another file within your user profile:
C:\Users\<Username>\.ssh\configThis file forms the list of servers you will see on VSCode, so you'll want to include an entry for each server you intend to connect to. Similar to above, you might find there are plenty of settings you want to configure, we'll just focus on two use-cases, logging in with a certificate and logging in with a password (for now).
#Use this format for certificate-based login
Host SomeDockerServer
  IdentityFile ~/.ssh/Docker-Swarm.pub
  IdentitiesOnly yes

#Use this format for password-based login
Host SomeRemoteServer
  PreferredAuthentications password
If you haven't followed this guide exactly, you may also want to add your username, such as the one below:
Host One-Of-My-Cloud-Servers
User adam
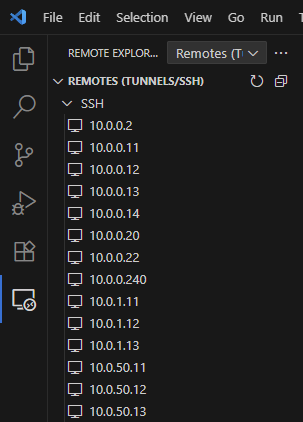
PreferredAuthentications passwordOnce you have assembled and saved this file, you should see the list of servers in the Remote Explorer tab. Below, I have listed IP addresses as an example, but you may find using hostnames to be significantly more useful.
The first time you connect to a server, you'll be prompted to choose whether it is a Linux, Windows, or Mac device. Choose as relevant and follow any additional steps as relevant.
Congrats! You have the necessary setup to perform remote management of servers.
Extra Credit
Save As Root
I can't take credit for this one but a great little extension I've seen is save as root. This allows you to edit those pesky files that just need a little more user-level permissions (like sshd_config).
Shortening Hostnames
One of the really nice features of using the client config files for SSH is that you can also shorten really long server names to aliases.
To do so, edit the client config file of your choice with the following:
Host shortname
  Hostname ReallyLongServerName.SomeLongDomainName.co.uk
  #Your other settings

